1. Introduction to Concrete Preparation
Before any epoxy coating can be applied, the concrete substrate must be meticulously prepared. This isn't just about cleaning; it's about creating a surface that allows the epoxy to bond mechanically and chemically, ensuring durability and longevity. Neglecting this crucial step is the most common reason for premature coating failure.
2. Key Surface Preparation Methods
Various methods are employed to prepare concrete, each suited for different conditions and desired outcomes. The goal is always to remove contaminants, laitance (weak surface concrete), and create a suitable surface profile.
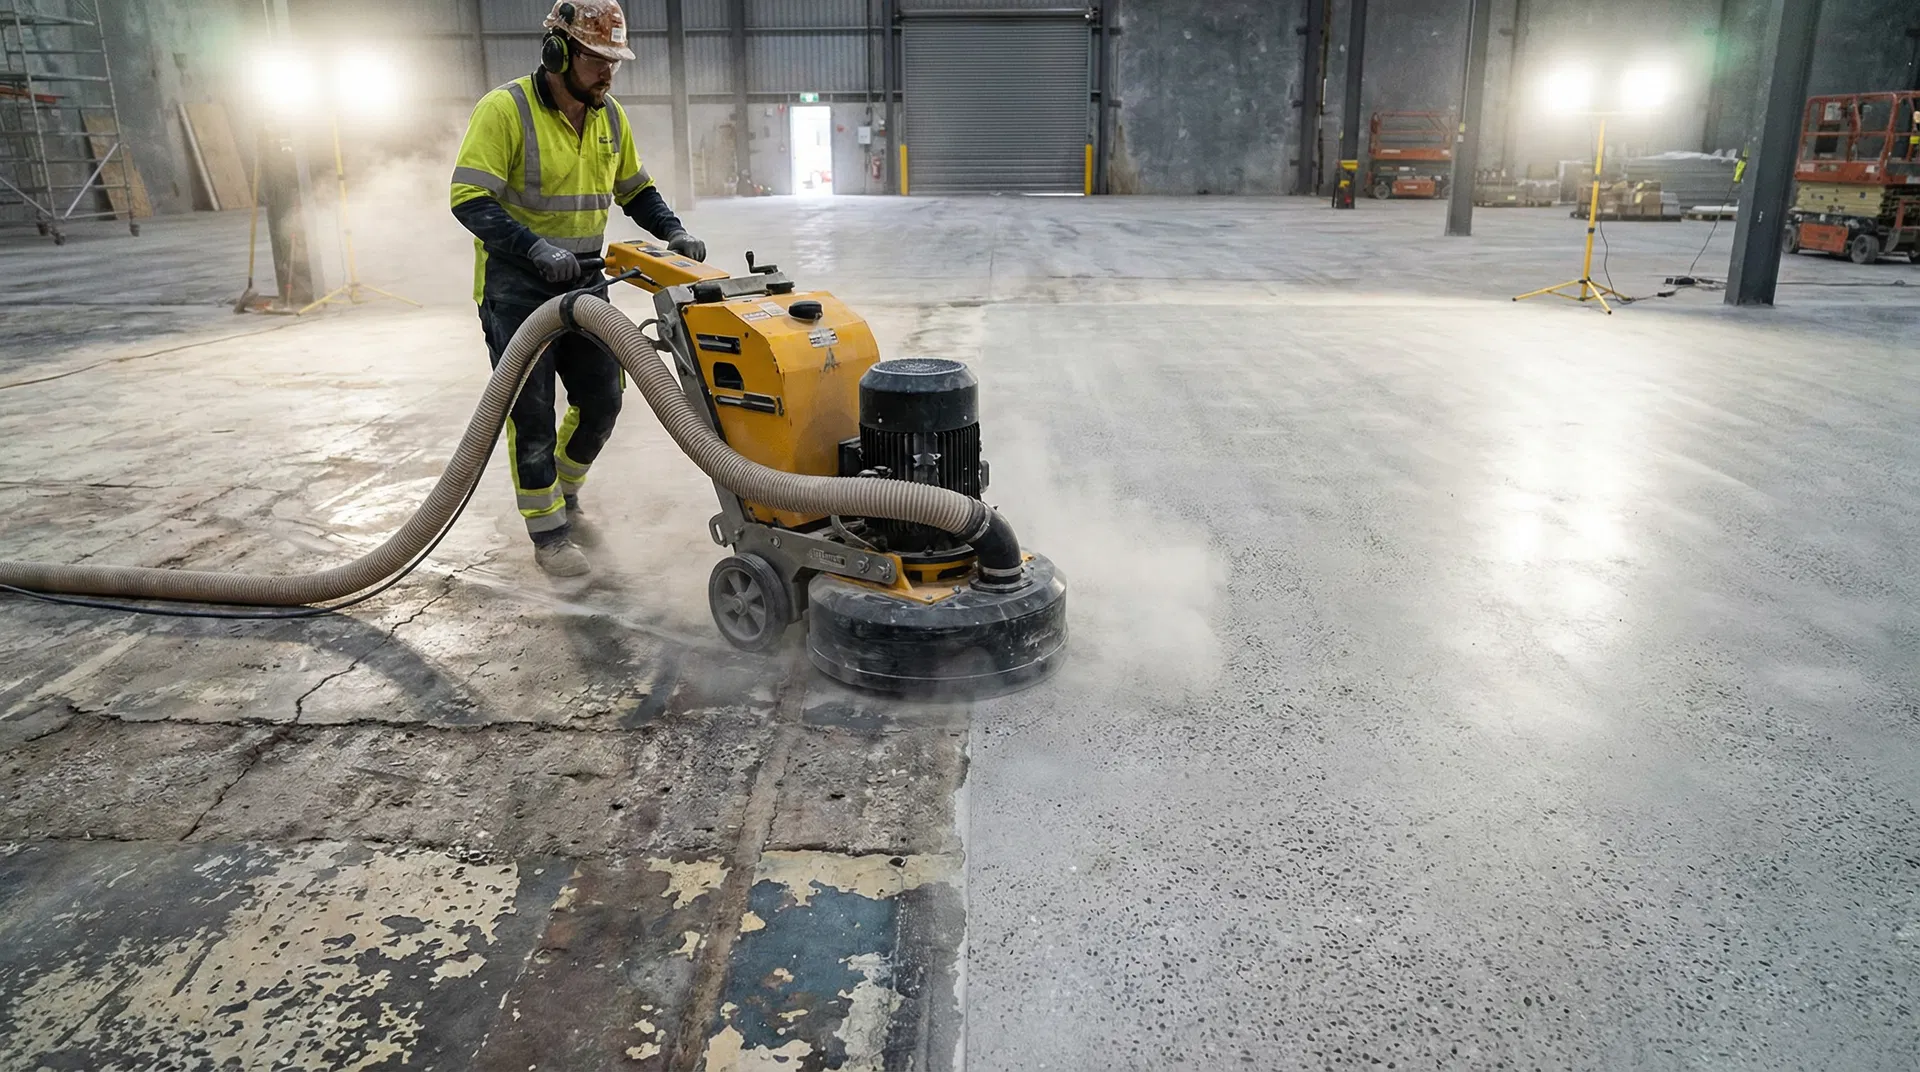
2.1. Diamond Grinding
Diamond grinding uses rotating abrasive discs to remove surface imperfections, old coatings, and contaminants. It creates a smooth, yet profiled surface ideal for thin-mil coatings and primers. It's excellent for leveling minor inconsistencies and opening up the concrete pores.
- Pros: Excellent control over surface profile, dust-free with proper vacuum, good for small to medium areas.
- Cons: Slower for heavy removal, can leave swirl marks if not done correctly.
2.2. Shot Blasting
Shot blasting involves propelling abrasive steel shot at high velocity onto the concrete surface. This method is highly effective for aggressive removal of thick coatings, laitance, and creating a uniform, rough profile. It's often preferred for thicker epoxy systems that require a strong mechanical bond.
- Pros: Fast and efficient for large areas, creates an excellent profile for strong adhesion, removes significant material.
- Cons: Can be aggressive, requires specialized equipment, less suitable for intricate areas.
2.3. Acid Etching (Discouraged)
While historically used, acid etching is generally discouraged for professional epoxy applications. It can leave behind salts that interfere with adhesion and doesn't create a sufficient surface profile for most modern epoxy systems. Mechanical methods are always preferred.
3. The CSP Scale: Understanding Surface Profile
The International Concrete Repair Institute (ICRI) developed the Concrete Surface Profile (CSP) scale to quantify the roughness of a concrete surface. It ranges from CSP 1 (lightly profiled) to CSP 10 (very rough, heavy removal). Most epoxy systems require a CSP of 2-4 for optimal adhesion, achieved through grinding or light shot blasting.
| CSP Number | Description | Typical Method | Suitable For |
|---|---|---|---|
| CSP 1-2 | Light profile, broom finish | Acid Etching (not recommended), Light Grinding | Thin coatings, sealers |
| CSP 3-4 | Medium profile, sandpaper-like | Diamond Grinding, Light Shot Blasting | Most epoxy coatings, self-leveling systems |
| CSP 5-6 | Rough profile, light scarification | Medium Shot Blasting, Scarification | Thick-mil coatings, broadcast systems |
| CSP 7-10 | Very rough, heavy scarification | Heavy Shot Blasting, Scarification, Jackhammering | Polymer overlays, concrete repair |
Source: International Concrete Repair Institute (ICRI)
4. Moisture Testing: A Critical Step
Moisture within the concrete slab is a leading cause of epoxy failure. Even if the surface appears dry, moisture vapor can migrate upwards, creating hydrostatic pressure that delaminates the coating. Essential moisture tests include:
- Calcium Chloride Test (ASTM F1869): Measures moisture vapor emission rate (MVER).
- Relative Humidity (RH) Probe Test (ASTM F2170): Measures internal relative humidity within the slab. This is generally considered the most reliable method.
- Plastic Sheet Test (ASTM D4263): A qualitative test to detect the presence of moisture, but not its quantity.
Always follow manufacturer guidelines for acceptable moisture levels before applying epoxy.
5. Why 90% of Failures are Prep-Related
The statistic that 90% of epoxy flooring failures stem from inadequate preparation is widely cited for good reason. Epoxy coatings rely heavily on a strong bond with the concrete. This bond can be compromised by:
- Contaminants: Oil, grease, paint, sealers, and dirt prevent proper adhesion.
- Laitance: A weak, dusty layer on new concrete that must be removed.
- Insufficient Profile: A surface that is too smooth won't provide the mechanical "grip" for the epoxy.
- Moisture: As discussed, moisture vapor can push the coating off the slab.
- Old Coatings: Incompatible or poorly adhered existing coatings must be removed.
Investing time and resources into proper preparation is far more cost-effective than dealing with the remediation of a failed epoxy floor.
6. Cost Comparison of Preparation Methods
The cost of concrete preparation varies significantly based on the method, the condition of the existing slab, and the size of the area. Here's a general comparison:
| Method | Cost per sq ft (Avg.) | Notes |
|---|---|---|
| Diamond Grinding | $1.00 - $3.00 | Good for light to medium prep, precise control. |
| Shot Blasting | $1.50 - $4.00 | Efficient for heavy removal, excellent profile. |
| Acid Etching | $0.50 - $1.50 | Cheaper but generally not recommended for epoxy. |
| Moisture Testing | $50 - $200 per test | Essential, often per 1000 sq ft. |
Note: Costs are estimates and can vary based on location, contractor, and project complexity.
7. Further Reading: Explore Epoxy Floors
To learn more about the benefits, types, and applications of epoxy flooring, visit our comprehensive guide:
Ready for a Durable Floor?
Get a free, no-obligation quote for your epoxy flooring project today!
Get Your Free QuoteRelated Articles
Types of Epoxy Systems
Discover the different epoxy systems available and which one is right for your needs.
Read MoreEpoxy Flooring Maintenance
Tips and best practices for keeping your epoxy floor looking new.
Read MoreDIY Epoxy vs. Professional Installation
Weigh the pros and cons of installing epoxy yourself versus hiring a professional.
Read More